To install column cladding, first clean and smooth the column surface thoroughly. Apply primer or protective coating if needed, then fix support brackets evenly. Position each panel precisely, fasten with screws or clips, and check alignment at multiple points. This method ensures the panels remain secure, look seamless, and maintain their structural integrity over years, even under heavy use or outdoor exposure.
1.Preparation Before Installation
Proper preparation sets the foundation for a smooth column cladding panel installation. Skipping these steps can lead to misaligned panels, uneven surfaces, and higher maintenance costs down the road.
1.1Measuring and Assessing the Column Dimensions
Accurate measurement ensures the panels fit perfectly. Start by measuring the height, width, and circumference of each column. Use a laser distance meter for precision, as traditional tape measures can introduce errors of up to 5–10 mm over long distances. For square or rectangular columns, double-check corner angles using a digital protractor to avoid gaps during installation.
Real-life example:a commercial lobby in New York had columns ranging from 3.2 m to 4 m in height, and improper early measurements would have caused misaligned panels that needed costly rework. Using precise measurements reduced material waste by 15% and installation time by 20%.
1.2Selecting Suitable Cladding Material
Choosing the right material affects durability, maintenance, and overall appearance. Options include stainless steel column cladding, aluminum, composite, or even decorative wood panels. Compare materials based on:
| Material | Lifespan (Years) | Frecvența întreținerii | Cost per m² (USD) | Typical Application |
|---|---|---|---|---|
| Oţel inoxidabil | 30–50 | Low (annual cleaning) | 150–300 | Hotels, airports, offices |
| Aluminum | 20–30 | Low–Medium | 100–200 | Commercial façades, shopping malls |
| Composite | 15–25 | Mediu | 80–150 | Residential, decorative interiors |
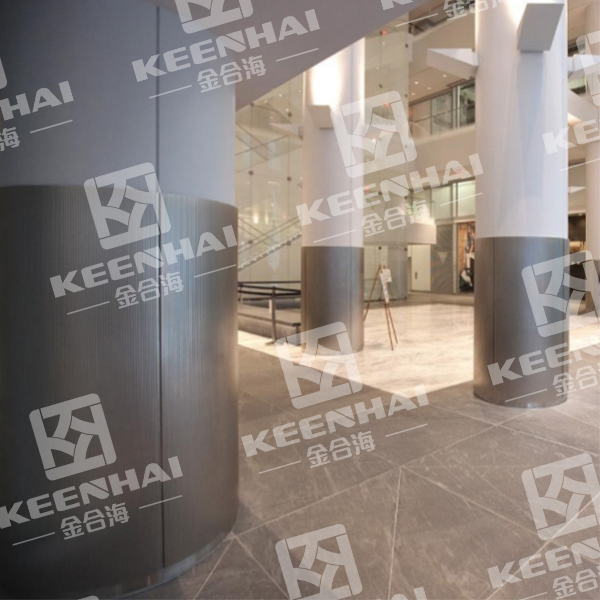
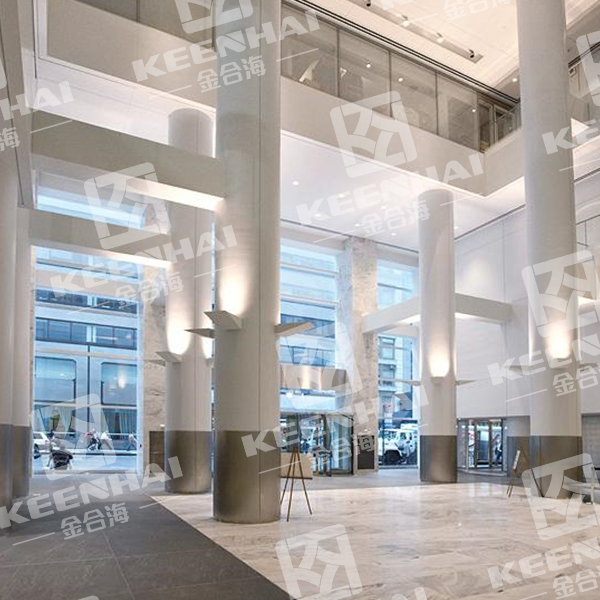
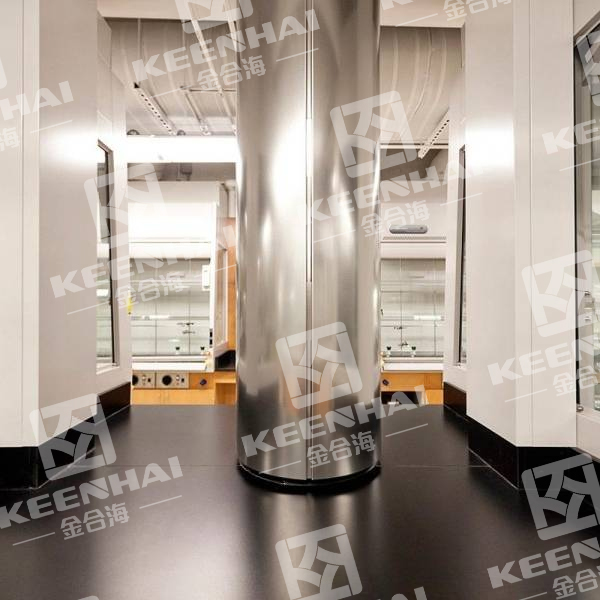
In practice, stainless steel is ideal for high-traffic areas, as it resists scratches and corrosion, while aluminum is preferred for lighter structures where budget and weight are factors.
1.3Tools and Equipment Needed
Having the right tools improves both speed and accuracy. Essential tools include:
-
Laser distance meter:Ensures exact measurements for all columns.
-
Digital protractor and level:Helps maintain alignment and plumb accuracy within 1–2 mm tolerance.
-
Drill and screwdrivers:Used to attach brackets and panels; high-torque drills reduce installation time by 30% compared to standard drills.
-
Protective gear:Gloves, goggles, and dust masks are essential for safety and precision.
-
Adhesives or fasteners:Depending on material, industrial-grade epoxy or stainless steel screws ensure long-lasting attachment.
Case in point:a boutique hotel in Los Angeles installed column cladding panels around its lobby columns. They used high-precision laser tools and torque-controlled drills, reducing installation errors to under 2% of total panels and keeping aesthetic lines perfectly aligned.
Proper preparation also involves assessing budget, panel specifications, and timeline. For example, high-quality stainless steel panels cost more upfront but save thousands in maintenance over 10–15 years. Knowing these factors in advance allows project managers to plan resources and schedule installation efficiently.
2.Surface Preparation
2.1 Cleaning and Smoothing the Column Surface
Before installing any cladding panels, it’s crucial to ensure the column surface is clean and smooth. Dirt, dust, or old paint can prevent adhesives or fasteners from properly bonding. Use a wire brush or industrial vacuum to remove loose debris. For concrete or masonry columns, minor surface irregularities can be leveled with a thin layer of cementitious filler, ensuring an even base.
For example, in a high-rise office in Chicago, uneven concrete columns caused gaps during initial panel installation. After smoothing the surface with a grinder and filler, installers achieved alignment within 2 mm tolerance, preventing costly rework. For metal columns, a degreasing agent helps remove oil residues, improving adhesion for both adhesives and mechanical fasteners.
2.2 Applying Primer or Protective Coating if Needed
Applying a primer or protective coating enhances the longevity of your cladding system. For stainless steel or aluminum panels, a corrosion-resistant primer on the column surface prevents rust formation, especially in humid or coastal environments.
Key considerations include:
-
Primer type:Use epoxy-based primers for concrete and anti-corrosion primers for metal.
-
Coverage:Ensure full coverage of the column, including corners and edges, typically requiring 1.2–1.5 liters per m².
-
Drying time:Most primers require 2–4 hours drying at 20°C for optimal adhesion.
In practice, a luxury hotel in Miami applied primer to all lobby columns before installing stainless steel column cladding. This step prevented any discoloration or rust streaks despite the high humidity and frequent cleaning with mild detergents.
2.3 Ensuring Structural Stability
A secure base is essential for any cladding system. Inspect columns for cracks, spalling, or structural weaknesses. Minor cracks can be repaired with high-strength mortar, while more significant damage may require reinforcement. Ensure that columns can bear the added weight of cladding panels, which for stainless steel or aluminum can range from 15–30 kg/m² depending on thickness.
| Column Type | Maximum Load per Panel (kg/m²) | Recommended Support Reinforcement | Typical Use Case |
|---|---|---|---|
| Concrete | 30 | Metal brackets or anchor bolts | High-rise commercial buildings |
| Oţel | 25 | Welding or bolted supports | Interior or exterior columns |
| Composite/Lightweight | 15 | Adhesive plus minimal brackets | Decorative interior columns |
For a shopping mall in Los Angeles, engineers verified all concrete columns could support up to 28 kg/m² of panel weight. They added minimal steel brackets at top and bottom for extra safety. The panels aligned perfectly, and inspections six months later confirmed zero movement or loosening.
3.Installing the Framework
A properly installed framework ensures column cladding panels sit perfectly and remain stable over time. Skipping or rushing this step leads to misalignment, gaps, and higher maintenance costs.
3.1 Attaching Support Brackets or Substructure
The first step involves mounting support brackets or a substructure that will hold the panels securely. Use stainless steel brackets for heavy panels, especially in high-traffic areas. The number of brackets depends on column height and panel weight: typically, one bracket every 50–60 cm vertically provides optimal stability.
Steps to follow:
-
Mark bracket positions on the column using a laser level to ensure even spacing.
-
Drill pilot holes for screws or anchors, matching the diameter to the bracket specifications (commonly 8–12 mm for concrete columns).
-
Secure the brackets with corrosion-resistant screws or bolts. For exterior projects, use stainless steel fasteners to prevent rust.
In a New York office tower, brackets were spaced 55 cm apart to hold stainless steel panels weighing 22 kg/m². This setup maintained perfect vertical alignment even under heavy wind loads.
3.2 Leveling and Aligning the Framework
Leveling the framework is crucial to avoid misaligned panels that look sloppy or create gaps. Use a laser level and digital spirit level to check plumb and alignment at multiple points along the column.
Key tips:
-
Check both vertical and horizontal alignment simultaneously for tall columns.
-
Adjust brackets incrementally; even 1–2 mm shift can affect final panel alignment.
-
Secure temporary shims if needed to hold brackets while tightening screws.
A boutique hotel in Los Angeles used digital leveling tools to align 12 lobby columns. By checking alignment at three heights per column, installers kept deviations under 2 mm, ensuring a visually seamless look for column cladding panels.
3.3 Securing Framework for Panel Attachment
Once brackets are aligned, reinforce the substructure to handle panel weight and external forces. For heavy stainless steel or aluminum panels, consider additional horizontal crossbars for extra support.
Important points:
-
Tighten all fasteners gradually to prevent uneven stress distribution.
-
Test stability manually by applying moderate pressure; framework should not wobble.
-
Check for gaps between the substructure and column surface; filling minor gaps with shims prevents panel warping.
In a Miami hotel project, engineers reinforced the substructure with horizontal stainless steel bars every 1.2 m. This allowed 28 kg/m² panels to stay perfectly aligned while staff moved equipment nearby during construction.
4.Mounting the Cladding Panels
Installing the cladding panels is the step where all prior preparation and framework setup pay off. Proper handling ensures panels align perfectly, fit snugly, and last for decades without warping or gaps.
4.1 Positioning and Aligning the Panels
Before attaching, always dry-fit each panel to check alignment with the column and neighboring panels. Use temporary supports or clamps to hold panels in place.
Key steps:
-
Mark panel positions on the framework using a pencil or chalk line. Precision matters—a 2 mm misalignment on a 3-meter-tall column becomes visually obvious.
-
Place the panel starting from the bottom, as gravity helps maintain alignment. Taller columns often benefit from 2–3 installers per panel to ensure safe handling and precise positioning.
-
Check spacing between panels. For metal panels, maintain 2–4 mm expansion gaps to accommodate thermal movement.
A luxury hotel in Miami used stainless steel column cladding in the lobby. Installers dry-fitted each panel, marking positions carefully, which reduced installation errors by over 30% compared to previous projects where panels were attached directly without pre-alignment.
4.2 Fastening Panels with Screws, Clips, or Adhesives
How you attach panels depends on the material and structure. Stainless steel and aluminum panels typically use screws or clips, while lighter composite panels can also use high-strength adhesives.
Steps to follow:
-
Select fasteners compatible with the material. For stainless steel panels, use stainless steel screws or clips to avoid corrosion.
-
Pre-drill holes if required. For thick metal panels, drilling pilot holes of 3–5 mm diameter prevents panel deformation.
-
Attach the panel from the bottom up, gradually fastening screws or clips. Alternate sides to avoid twisting or bowing.
-
Check vertical and horizontal alignment continuously with a laser level. Even small deviations can accumulate across multiple panels.
In a New York commercial lobby, installers fastened 22 kg/m² stainless steel panels using corrosion-resistant screws every 40 cm along vertical seams, securing panels tightly without damaging the surface.
4.3 Adjusting Seams and Edges for a Smooth Finish
Proper seam and edge alignment gives the column a professional, seamless look.
Tips and techniques:
-
Use a rubber mallet to gently tap panels into position if needed. Avoid metal hammers that can scratch or dent the surface.
-
Check for uniform gaps at corners and edges. A consistent gap of 2–3 mm allows for expansion and contraction.
-
Apply finishing trims or corner profiles to hide edges or end panels. Stainless steel trims often match the panel finish and add aesthetic appeal.
-
Inspect the installation under different lighting angles. Reflections on metal panels reveal even minor misalignments.
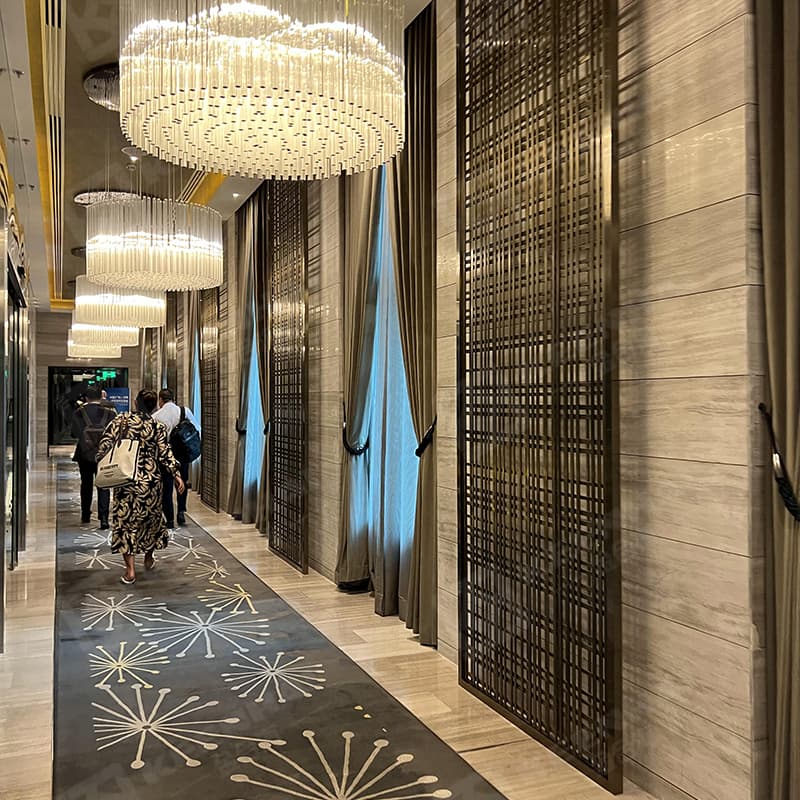
A boutique hotel in Los Angeles applied column cladding panels across all lobby columns. Installers adjusted seams with precision, adding corner trims where panels met at angled edges. Guests frequently commented on the flawless, mirror-like finish, showing the importance of careful seam adjustment.
Additional Installation Tips
-
Always handle panels with gloves to avoid fingerprints, scratches, or minor dents.
-
Sequence panels logically: bottom to top, left to right, or following the natural flow of the space to reduce error.
-
For outdoor columns exposed to sun or humidity, allow thermal gaps and use flexible sealant to prevent stress on screws or panels.
Installation guide finished? Pick the right panels and accessories in our column cladding installation product page.