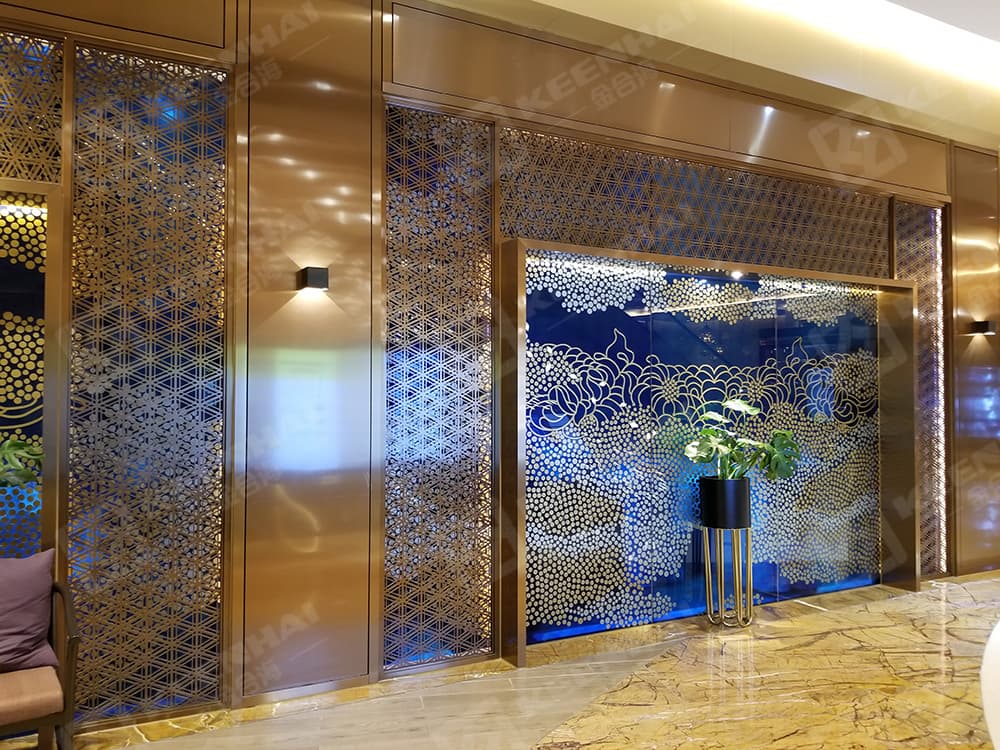
Stainless steel trim and edging strips protect exposed edges, create clean transitions, conceal joints, and give wall, ceiling, floor, panel, and countertop assemblies a controlled finished appearance. They are used in commercial interiors, hospitality spaces, healthcare facilities, kitchens, transport buildings, retail areas, exterior cladding interfaces, and other projects where appearance, hygiene, impact resistance, or corrosion resistance matters.
The right trim is not selected by finish alone. Width, thickness, profile, alloy, fixing method, substrate, movement, corner geometry, and cleaning conditions all affect performance. A narrow angle may protect a panel edge; a wider transition profile may cover a joint between two different materials. Some strips are bonded, some are mechanically fixed, and some are embedded into tile or panel systems. This guide explains how to compare stainless steel trim and edging strips, specify realistic dimensions, choose a finish, and install the product without damaging the visible surface.
What Are Stainless Steel Trim and Edging Strips, and How Are They Specified?
Stainless steel trim is a formed or machined component used to finish an edge, corner, joint, opening, or material transition. Common shapes include equal and unequal angles, U-channels, L-profiles, T-profiles, flat bars, corner guards, edge caps, shadow-gap profiles, and transition strips. A profile may be supplied in a straight length, cut-to-size piece, or fabricated assembly with mitred corners, returns, holes, or welded details.
Edging strips are often flatter or narrower than structural trim, but the terms overlap in everyday specifications. The important question is what the component must do. Is it protecting an exposed edge, covering a gap, holding a panel, separating finishes, guiding a sealant joint, or providing a visual line? A clear function helps the design team avoid specifying a decorative strip that is too thin, too short, or incompatible with the substrate. Also define whether the trim is visible from one side or several, whether it meets a wet area, and whether it must be removable for future access. These decisions affect the profile, return, joint, adhesive, and replacement method.

How to Specify Sizes and Profiles
There is no single standard size for every application. Start with the edge or joint that the trim must cover, then add enough bearing or return to remain stable after installation. Record the visible face width, return depth, length, corner radius, material thickness, hole pattern if required, and tolerance. Dimensions should be shown on a drawing or approved sample rather than communicated only by a general product name.
Long lengths can reduce joints but may be difficult to transport and align. Shorter pieces are easier to handle but create more visible connections. For curved edges, confirm whether the profile is roll-formed, segmented, or supplied as a flexible system. Do not assume a straight trim can be bent on site without distortion or finish damage.
Material Grade and Thickness
Stainless steel trim and edging strips are commonly specified using an austenitic grade appropriate to the environment, but the correct grade must follow the project specification and exposure conditions. Dry interior areas may have different requirements from kitchens, swimming-pool surroundings, coastal buildings, laboratories, or locations exposed to cleaning chemicals. Confirm compatibility with nearby metals, adhesives, sealants, grouts, and cleaning products.
Thickness is a design variable, not simply a price choice. A light trim may be suitable for a protected decorative edge, while a high-traffic corner or exposed panel return may require greater rigidity or a separate backing arrangement. The required thickness depends on the profile shape, unsupported width, impact risk, fixing method, and expected handling. Ask the fabricator for a sample or section drawing when appearance and stiffness are both important.
Avoid mixing unverified material descriptions such as “stainless look” with actual stainless steel specifications. A plated or coated substitute may not provide the same corrosion resistance, edge behavior, or cleaning performance. Record the grade, finish, thickness, and protective-film requirements in the purchase documents.

Stainless Steel Finishes
The finish changes how light, fingerprints, scratches, and small variations appear. Common architectural choices include bright or mirror-polished surfaces, satin or brushed finishes, directional hairline finishes, bead-blasted textures, and colored or coated surfaces where specifically approved. Brushed finishes usually require consistent grain direction; mixing directions at a visible corner can make otherwise accurate installation look uneven.
Always approve a physical sample under representative lighting. A digital image cannot reliably show reflectivity, grain, color, edge sharpness, or how a finish meets another surface. Keep the approved sample with the project records and identify which faces receive the directional finish.
Choosing Trim for Different Applications
For wall cladding, the profile should protect the panel edge and accommodate the panel thickness without creating a forced fit. At outside corners, consider impact, visible alignment, joint width, and whether a continuous corner or mitred assembly is required. At inside corners, leave enough room for sealant or movement where the system needs it.
For tile and wet-area applications, the trim must suit the tile thickness, adhesive bed, grout joint, water exposure, and cleaning regime. Do not treat a decorative edge as a waterproofing system. Waterproofing, substrate preparation, movement joints, and sealant details remain separate responsibilities.
For countertops, doors, furniture, elevator interiors, and high-traffic areas, examine impact, handling, cleaning, and access to replacement parts. A sharp exposed edge may be visually attractive but unsuitable where people or equipment pass close to it. Specify an appropriate radius or folded return where safety and durability require it. Before ordering, draw the adjacent finishes and the direction of movement at the junction. A profile that looks suitable in isolation may cast an unwanted shadow, create a trip or impact point, or leave an uncleanable recess once all layers are installed.

Installation Methods
The installation method depends on the profile, substrate, load, access, and required appearance. Common methods include neutral-cure adhesive, compatible construction adhesive, concealed clips, screws, rivets, press-fit details, and embedding into a tile or panel assembly. The adhesive or sealant must be compatible with stainless steel, the substrate, the finish, and the expected moisture and temperature range.
A reliable installation sequence is:
- Confirm dimensions, substrate flatness, edge condition, and the approved finish before cutting.
- Dry-fit the first piece and check the datum, visible width, returns, and adjoining materials.
- Mark cut lines on the protective film where possible, not directly on the visible face.
- Cut with clean, suitable equipment and deburr the edge without spreading contamination.
- Clean the bonding surfaces according to the adhesive or sealant instructions.
- Apply fixing material evenly, or install clips and fasteners without distorting the profile.
- Align adjoining pieces, maintain the specified joint, and avoid forcing mitres together.
- Remove excess adhesive before it cures and protect the finish during adjacent work.
- Inspect alignment, corners, scratches, film removal, and sealant continuity after installation.
Do not use carbon-steel tools or contaminated abrasives on a visible stainless steel surface. Iron particles can leave marks that appear as rust staining. Use clean tools reserved for stainless work, and follow the finish supplier’s cleaning guidance.
Jointing, Corners, and Movement
Long runs need a joint strategy. A continuous strip may look clean but can be difficult to transport, position, and replace. Separate pieces need consistent joint widths and accurately coordinated corners. Mitred corners can provide a continuous visual line, but the cut, angle, and polishing must be controlled. Welded or returned corners may be more robust for certain fabricated assemblies, but they require approved workmanship and finish treatment.
Do not bridge a building movement joint with rigid trim unless the system has been designed for that movement. Where adjacent materials expand, contract, or move differently, the trim detail should allow the intended movement or use a compatible transition. A sealant joint can complete a water or finish detail, but it should not be used to hide a poor substrate, incorrect measurement, or distorted profile. At long visible runs, establish a datum and a joint rhythm before fabrication. Small differences in cut length or corner angle can accumulate, so the first and last pieces should be checked against the same reference rather than installed by eye.

Quality Control and Maintenance
Before handover, check profile dimensions, finish direction, joint consistency, corners, exposed edges, fasteners, adhesive squeeze-out, protective-film removal, and damage from later trades. Compare the installed work with the approved sample in normal lighting. Record spare lengths, profile references, finish codes, cleaning instructions, and replacement sources.
Routine cleaning normally uses a soft cloth or sponge, clean water, and an approved mild cleaner. Avoid abrasive pads, chlorine-rich chemicals, strong acids, and unknown solvents. Wipe in the grain direction on brushed or hairline finishes. Remove cement, grout, adhesive, and salt deposits promptly using a method approved for the finish. If staining, pitting, peeling, or repeated discoloration appears, identify the cause before polishing or replacing the strip. Keep protective film in place during dusty work, but remove it within the period recommended by the fabricator so adhesive residue does not harden or discolor the surface. Record the cleaning product and method whenever a visible finish is difficult to match.
FAQ: Stainless Steel Trim and Edging Strips
What size stainless steel trim should I choose?
Choose the face width and return based on the edge or joint being covered, then verify thickness, fixing area, corner detail, and the visible relationship with adjacent materials. Approve a section sample for unusual conditions.
Is brushed stainless steel easy to maintain?
It can be practical, but the grain direction must be protected and cleaning should follow the finish instructions. Abrasive cleaning across the grain can create visible marks.
Can stainless steel edging strips be cut on site?
Some profiles can be cut on site, but the installer should use clean tools, deburr the cut, protect the finish, and verify the resulting corner or end detail. Factory-fabricated corners may be preferable for prominent areas.
Should trim be glued or mechanically fixed?
The choice depends on the profile, substrate, loads, access, moisture, and design requirements. Use only a fixing method compatible with the steel, finish, and substrate, and follow the system supplier’s instructions.
Závěr
Stainless steel trim and edging strips succeed when their function, size, material, finish, jointing, fixing, and maintenance are considered together. Define the profile from the actual edge condition, approve a physical finish sample, coordinate corners and movement, use clean fabrication and installation tools, and retain product records for future repairs. This process produces a sharper architectural result and reduces the risk of stained surfaces, forced joints, mismatched finishes, and premature replacement. It also gives the contractor a repeatable installation reference and gives the owner enough information to clean, inspect, and repair the detail without guessing. The same discipline is useful for procurement: a clear section, finish sample, tolerance, fixing note, and replacement reference makes it easier to compare quotations without treating unlike products as equivalent. In prominent public areas, that clarity can prevent a small edge detail from becoming a recurring source of visible defects or maintenance complaints. It also supports clearer handover documentation when the original installer or fabricator is no longer available.